Creating new LOST status

KOHA comes with a set of LOST statuses, which can be viewed here. In addition to these standard statuses it is possible for staff to add new statuses which reflect the needs of their own site.
Step 1 - View existing LOST statuses
Go to KOHA administration > Basic parameters > Authorized values.


This will bring you to a table of all authorized values categories available on your site.

At the top of this table there will be a search box that can be used to find a specific authorized value. Search for lost and the table will reduce down to the LOST category. Click the word LOST in the Category column and this will open a new page with a table of the LOST authorised values.

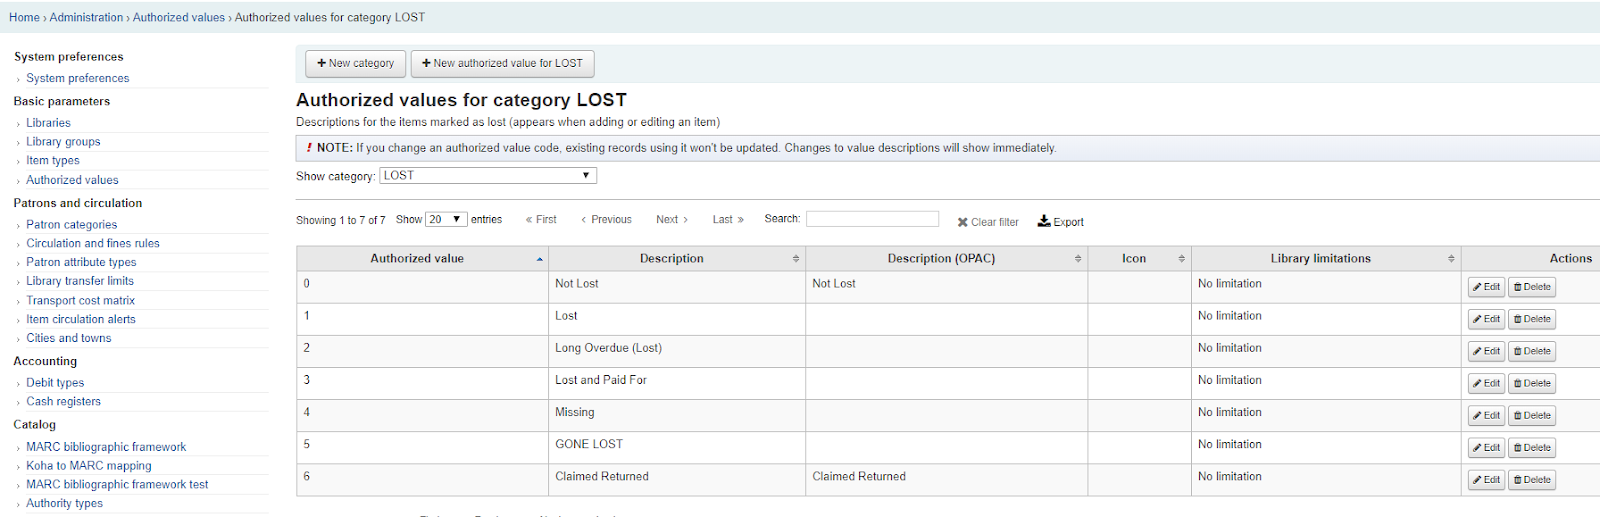
Step 2 - Add a new LOST status
Click on the +New authorised value for LOST at the top of the table and this will bring you to a new page with a form to fill out.

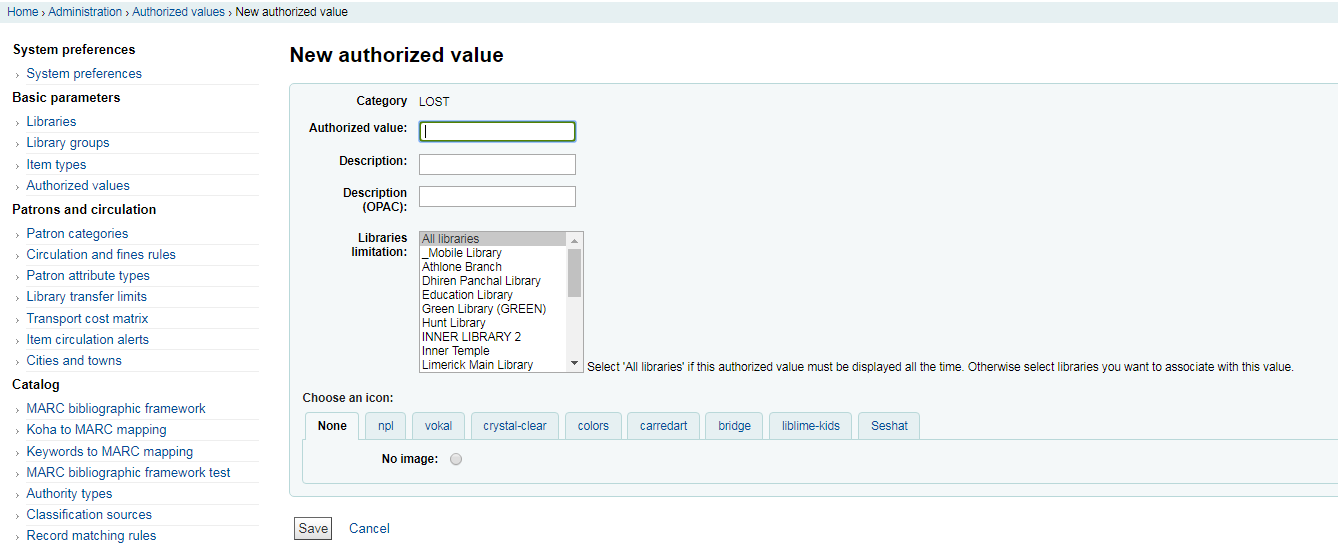
Authorized value
This should be a positive number that is not already in use by another LOST status in the LOST authorized value table.
Description
This should be a human readable label that informs staff about the nature of the LOST status.
Description (OPAC)
This should be a human readable label that informs patrons on the OPAC about the nature of the LOST status.
Libraries limitation
This option enables the Lost status to only be available for libraries selected from the list.
Choose an icon
This option enables an image to be associated with a specific LOST status.
Once this form is filled out hit Save and the new authorized value will appear in the LOST table.