Adding a New Vendor

How to Add a New Vendor
This document explains how to add a vendor.
Before any orders can be placed you must first enter at least one vendor.
To add a vendor click the 'New Vendor' button on the Acquisitions page

The vendor add form is broken into three pieces
The first section is for basic information about the Vendor

Of these fields, only the Vendor name is required, the rest of the information should
be added to help with generating claim letters and invoices
The second section is for information regarding your contact at the Vendor's office

You can enter several contacts if you have different contacts for different functions.
It is important to enter valid email addresses if you want to email orders or claims.
None of the contact fields other than email address are required, they should only
be entered if you want to keep track of your contact's information within Koha.
The final section is for billing information
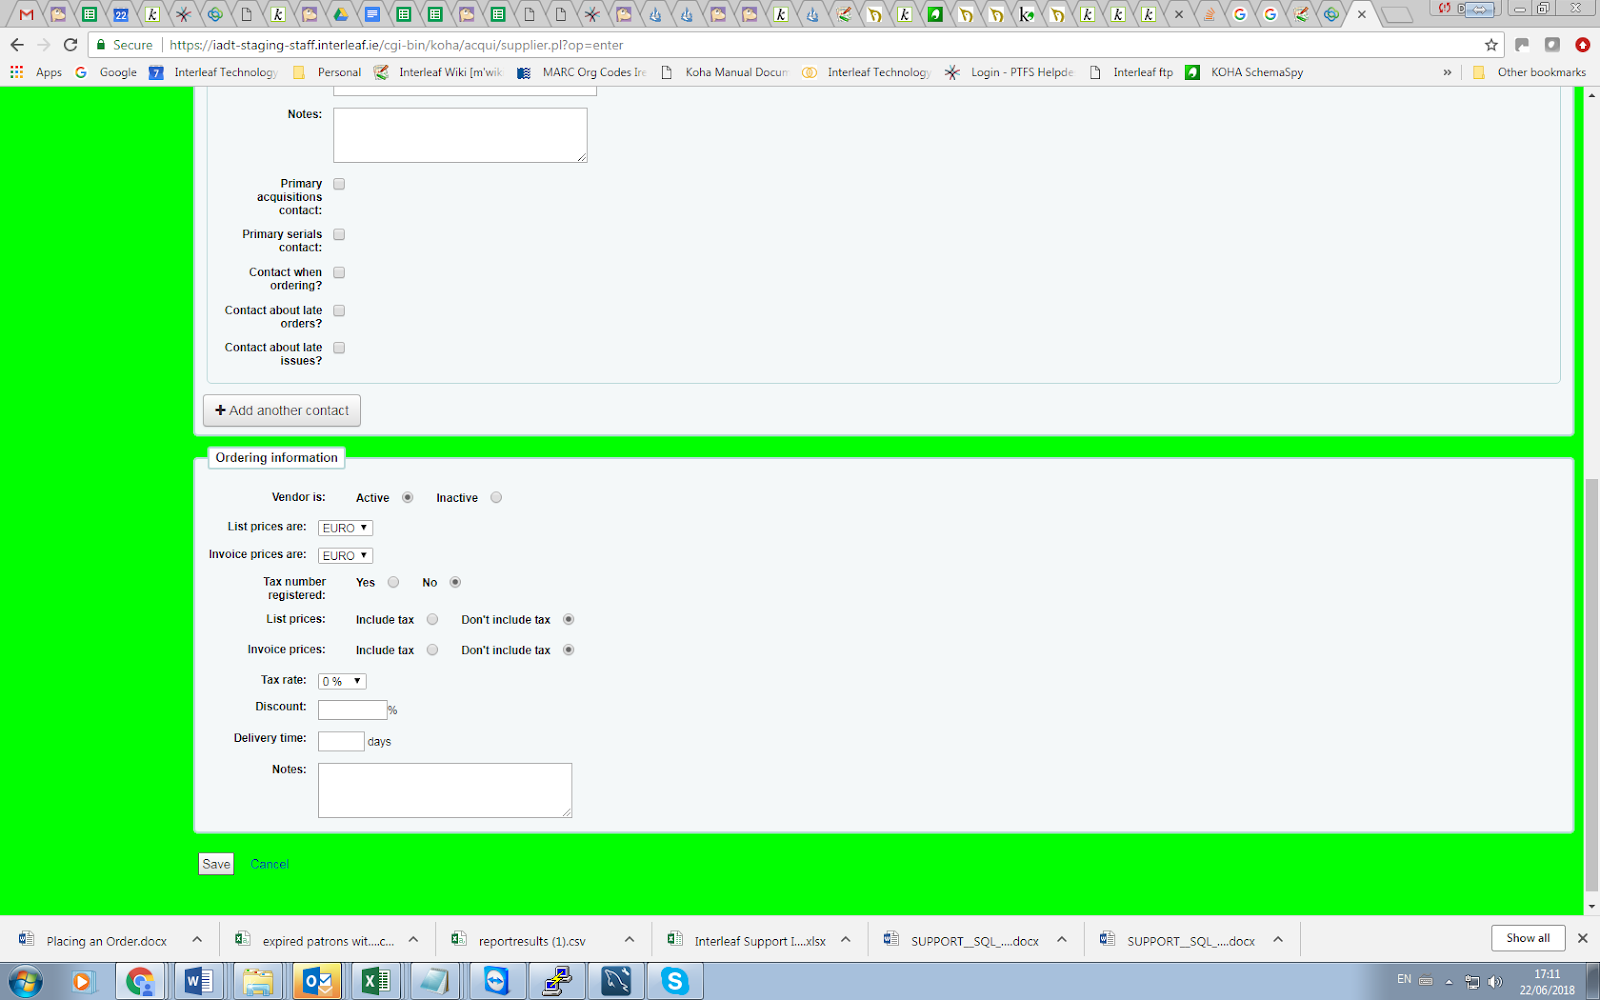
To be able to order from a vendor you must make them 'Active'
For List Prices and Invoice Prices choose the currency
Currencies are assigned in the Currencies & Exchange Rates admin area
If your library is charged tax mark your Tax Number as registered
Note if you list prices and/or invoice prices include tax
If the vendor offers a consistent blank discount, enter that in the 'Discount' field
You can enter item specific discounts when placing an order
Enter your tax rate if your library is charged taxes on orders
If you know how long it usually takes orders to arrive from this vendor you can enter a delivery time.
This will allow Koha to estimate when orders will arrive at your library on the late orders report.
Notes are for internal use