Placing an Order

How to Place an Order
This document explains how to place an order.
To place an order you must first search for the vendor or bookseller you want to send the order to.
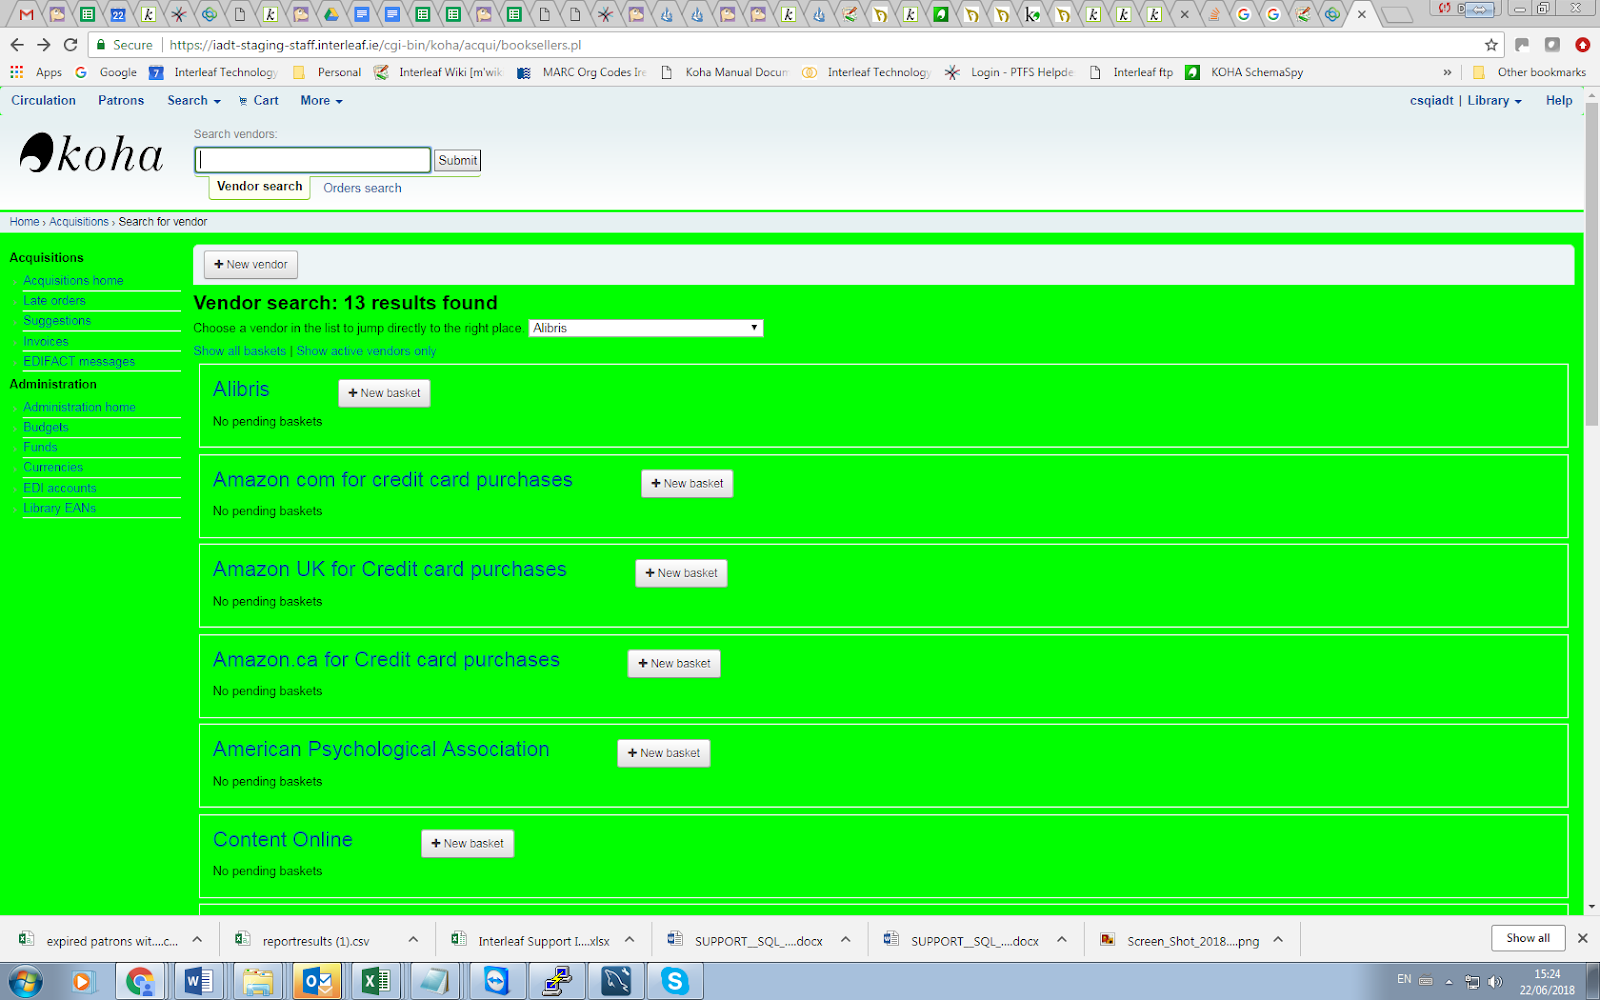
Enter part of the vendor name and click submit or just click submit to list all vendors.
And click the 'New basket' button to the right of the vendor name.
After clicking 'New basket' you will be asked to enter some information about the order:
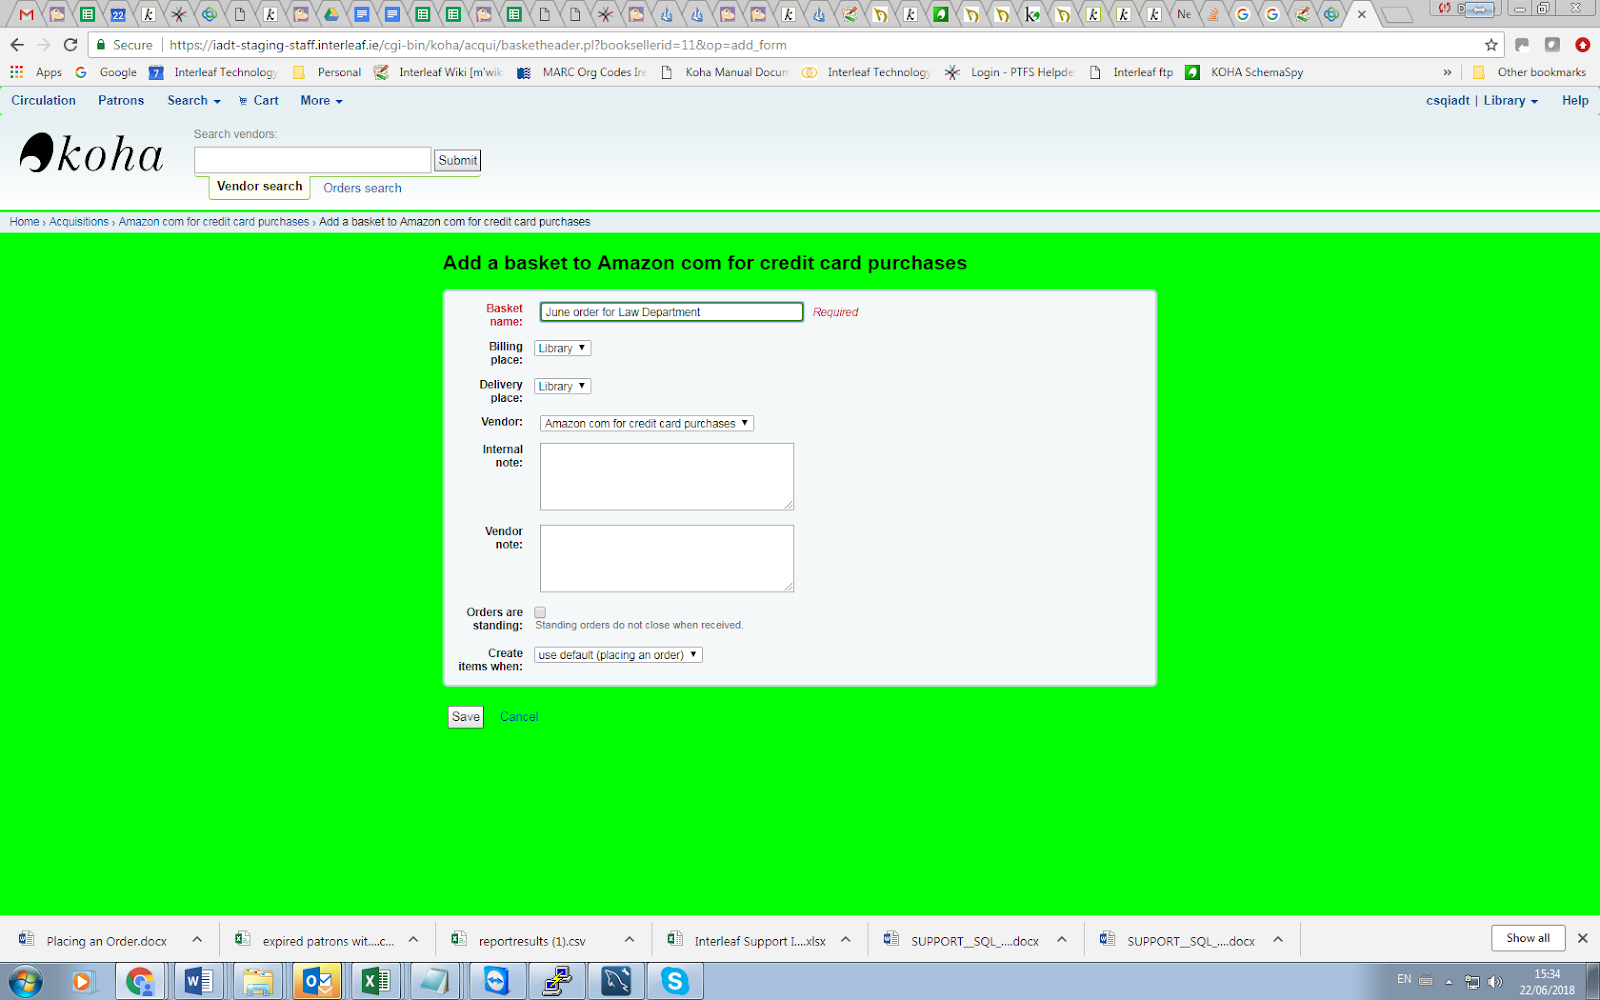
When adding a basket you want to give it a name that will help you identify it later
Enter the Billing Place and Delivery Place (this will default to the library you're logged in at)
If you would like to change the vendor you're ordering from you can use the Vendor pull down menu
The notes fields are optional and can contain any type of information
If you're ordering standing items (items which arrive regularly) then you will want to
check the 'Orders are standing' box for this basket
If you are using EDI your system will be set to create items when placing an order, don’t change this. If you have added contracts to the vendor you're ordering from, you will also have an option to choose which contract you're ordering these items under.
When finished, click 'Save'
Once your basket is created you are presented with several options for adding items to the order.
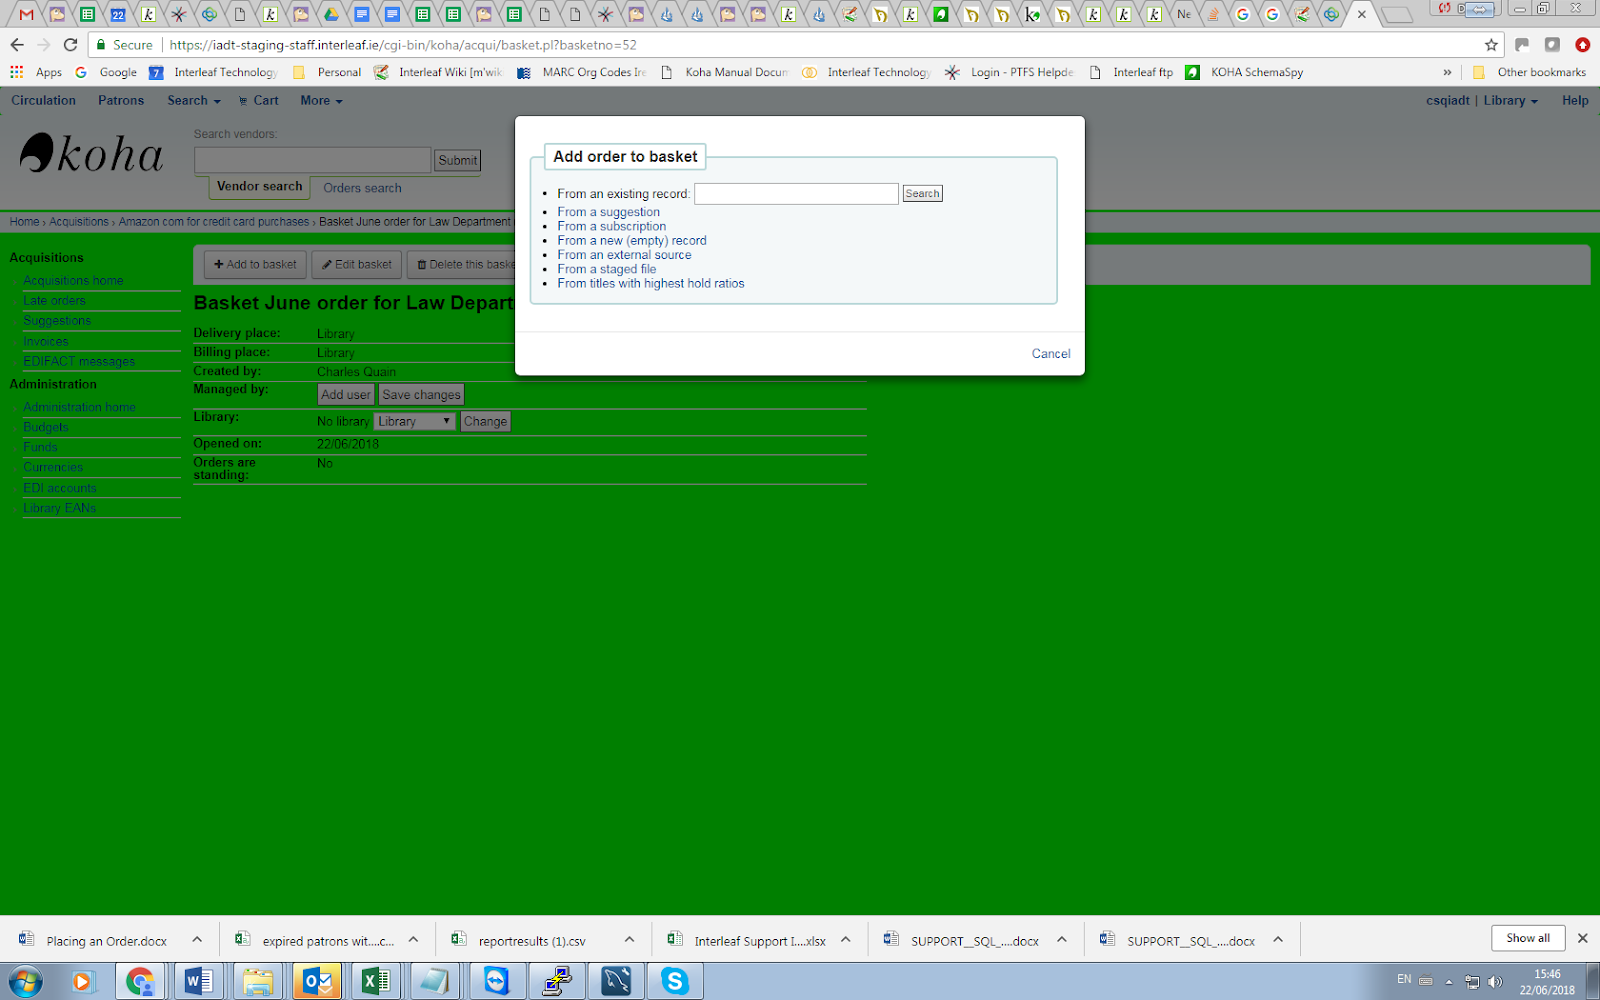
If you are ordering another copy of an existing item, you can simply search for the record in your system.

From the results, simply click 'Order' to be brought to the order form.
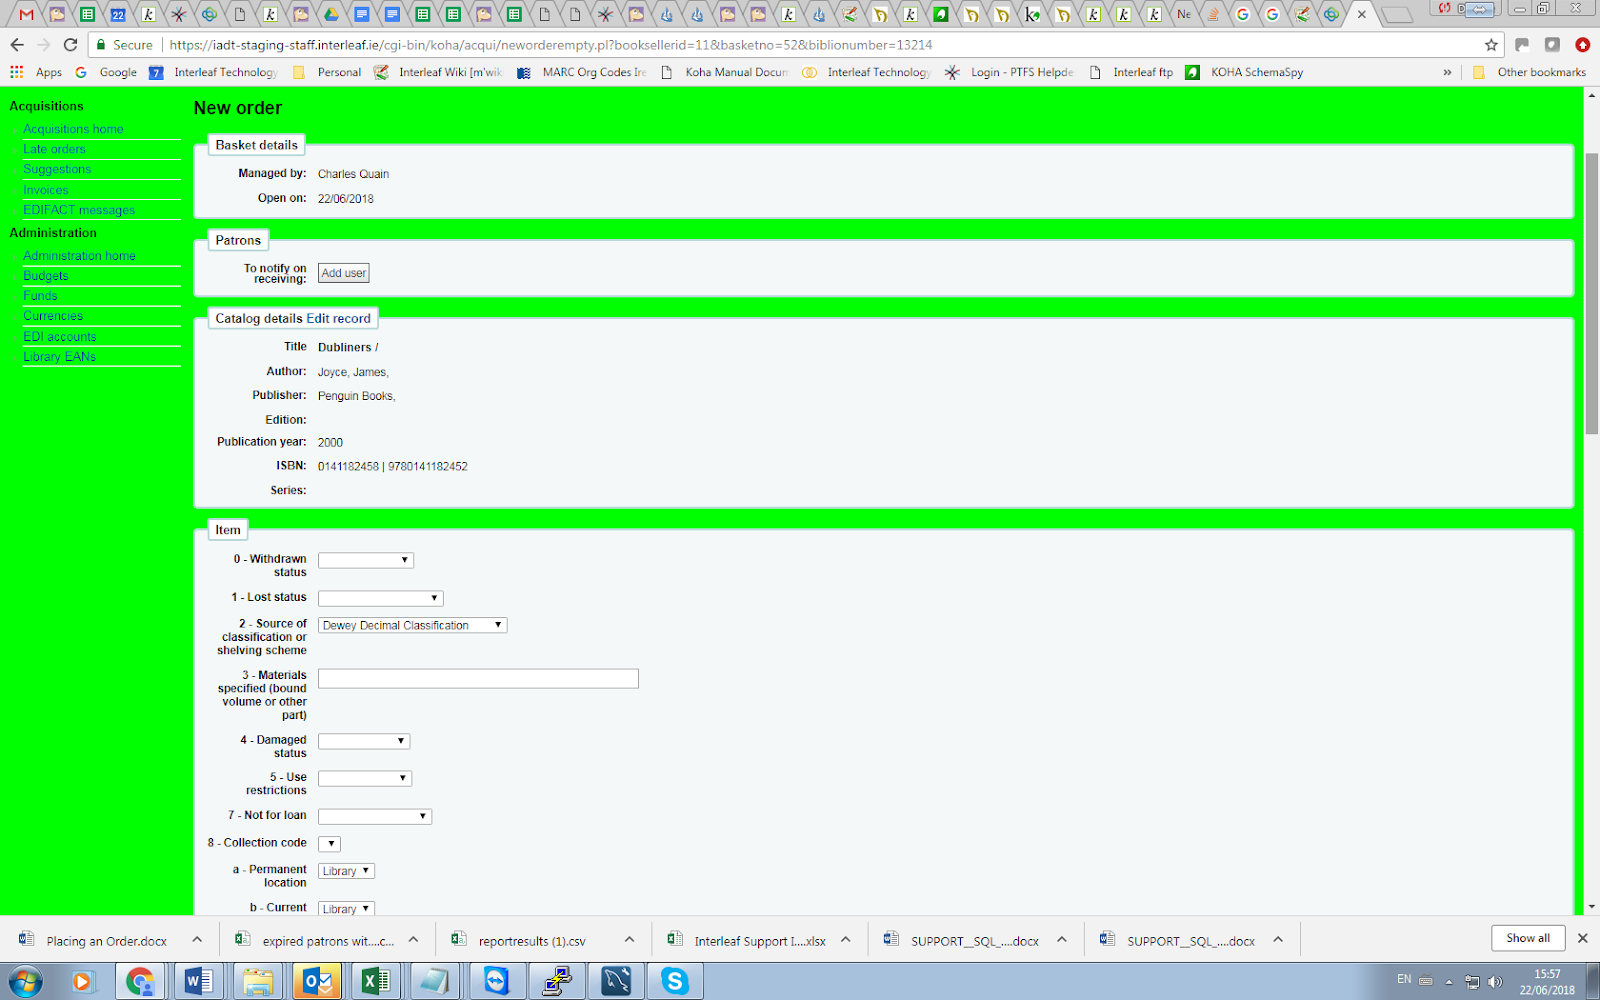
After bringing in the bib information if your ‘AcqCreateItem’ system preference is set to add an item when ordering you will enter the item info next. You need to fill out at least one item record and then click the 'Add' button at the bottom left of the item form.
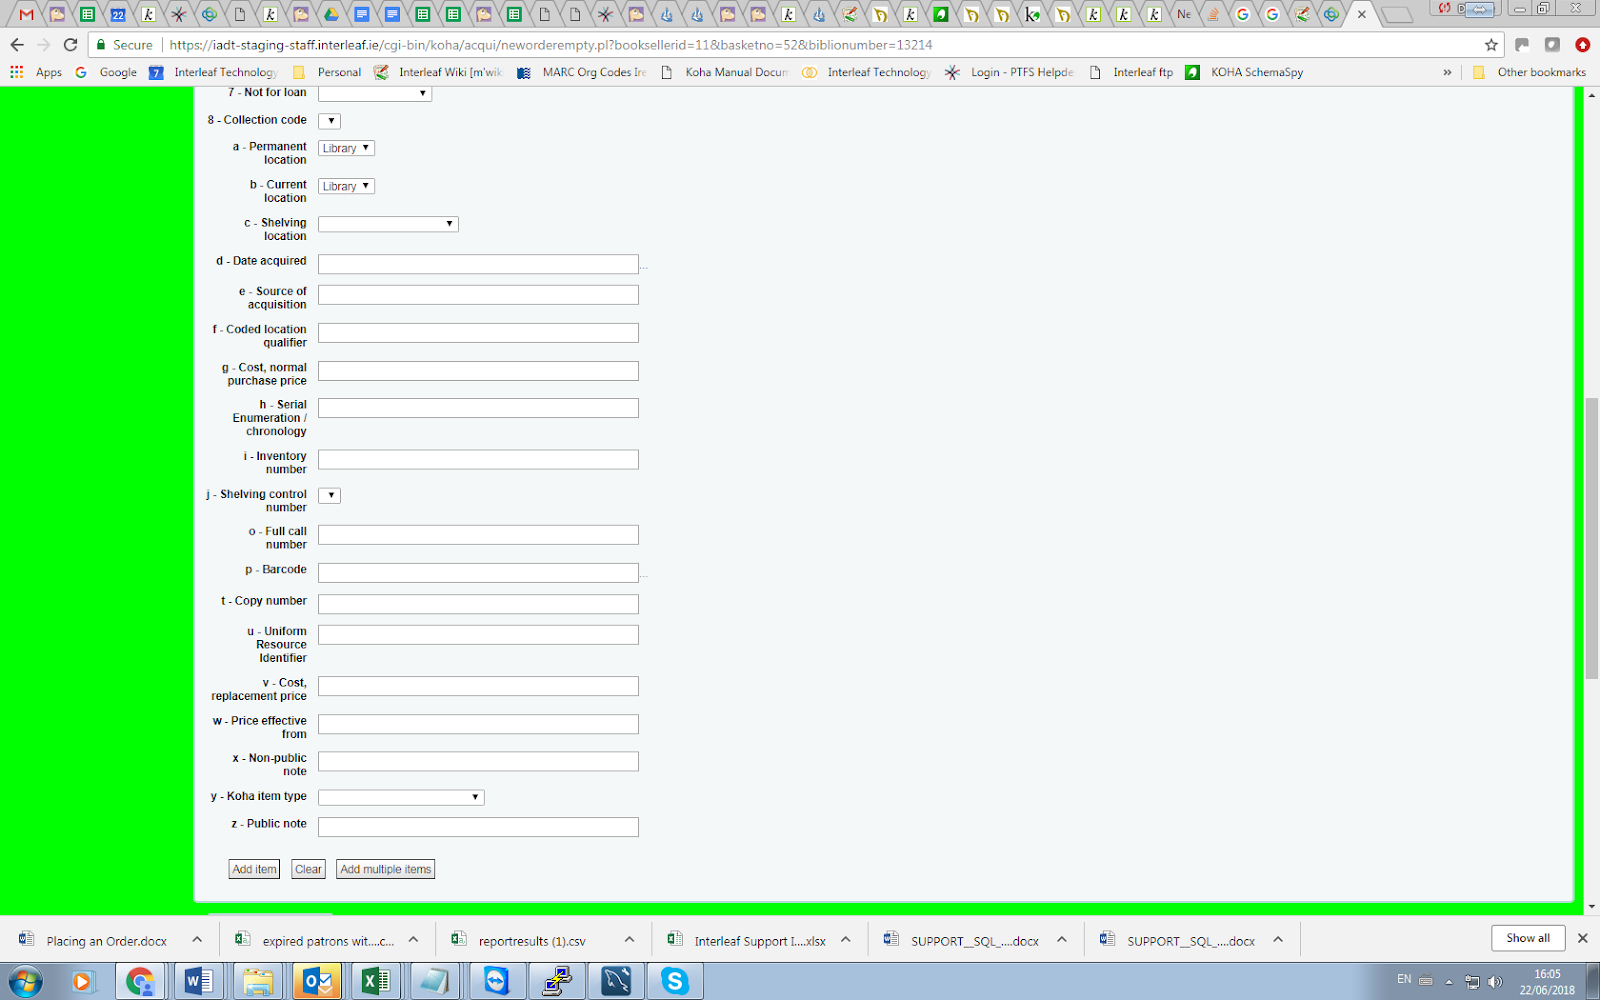
After clicking the 'Add item' or ‘Add multiple items’ button, you need to enter the Accounting information.
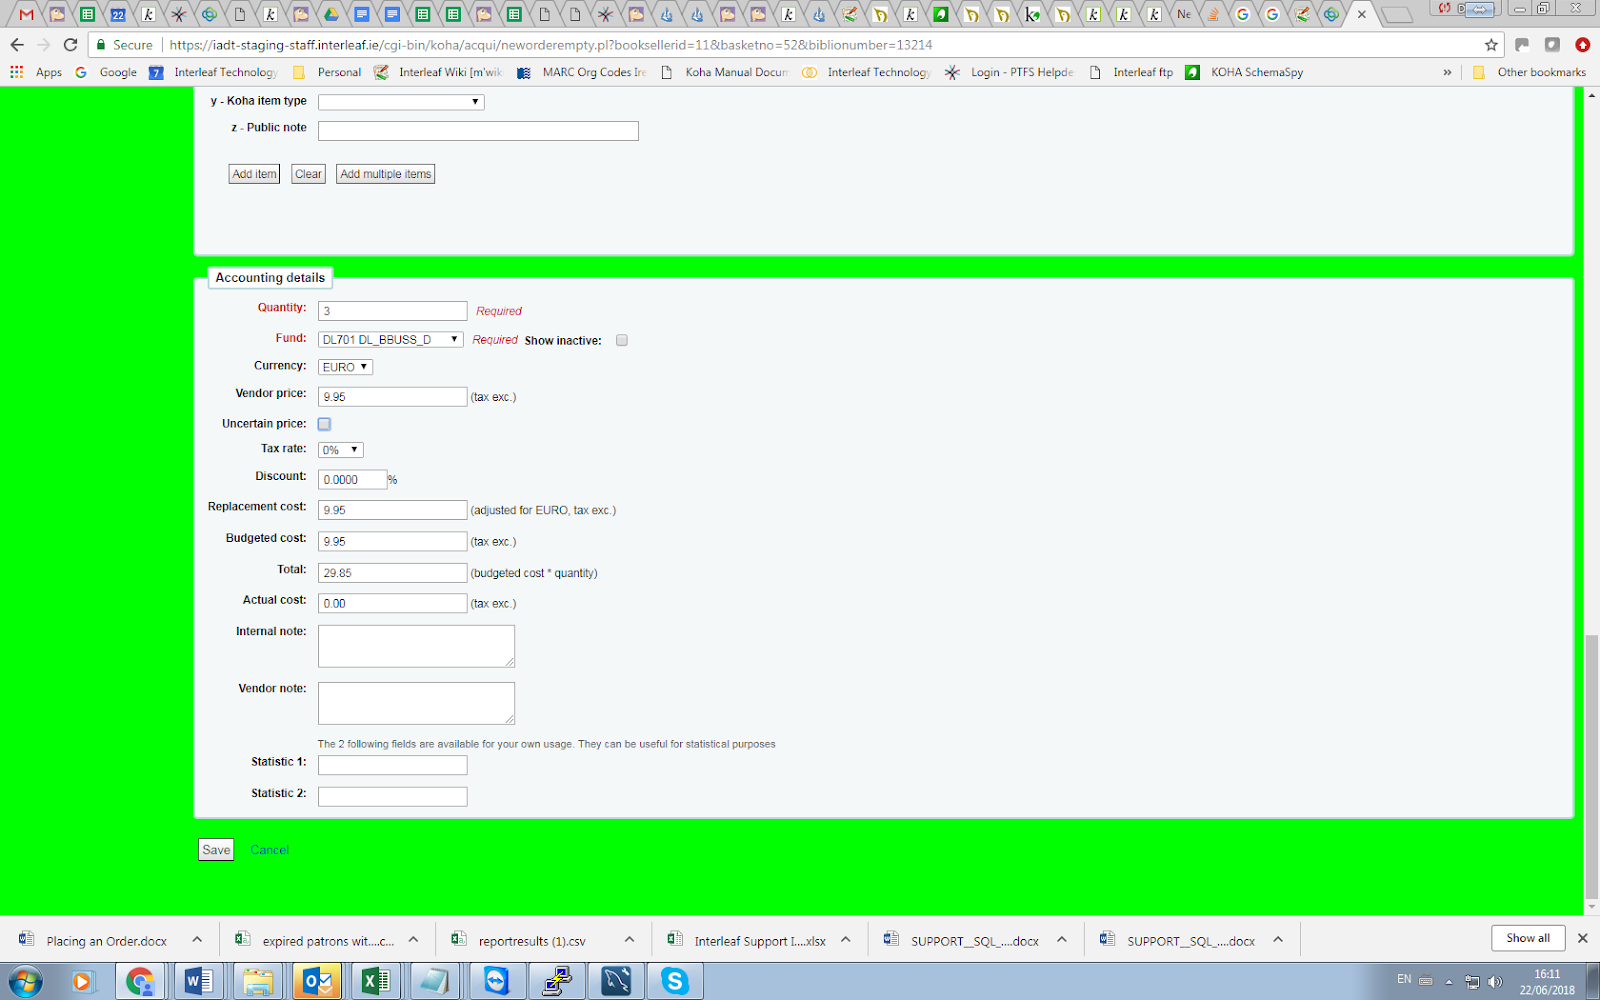
Quantity is populated by the number of items you've added to the order above.
Important : You cannot edit the quantity manually, you must click 'Add' below
the item form to add as many items as you're ordering.
The list of funds is populated by the funds you have assigned in the Acquisitions Administration area.
The currency pull down will have the currencies you set up in the Acquisitions Administration area.
The vendor price is the price before any taxes or discounts are applied.
If the price is uncertain, check the uncertain price box.
A basket with at least one uncertain price can't be closed.
If you are charged VAT separately, choose the relevant rate from the Tax Rate field
Enter the percentage discount you're receiving on this order, once you enter this,
hit tab and Koha will populate the rest of the cost fields below.
If you added Planning Values when creating the Fund, those values will appear
in the two Planning Value fields.
Once you have filled in all of the fields click 'Save' to add the item to your basket.
If your price goes over the amount available in the fund you will be presented with a confirmation.
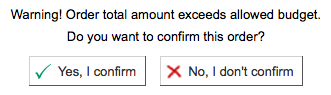
The confirmation warning will allow you order past your fund amount if you so choose.
After an item is added to the basket you will be presented with a basket summary.
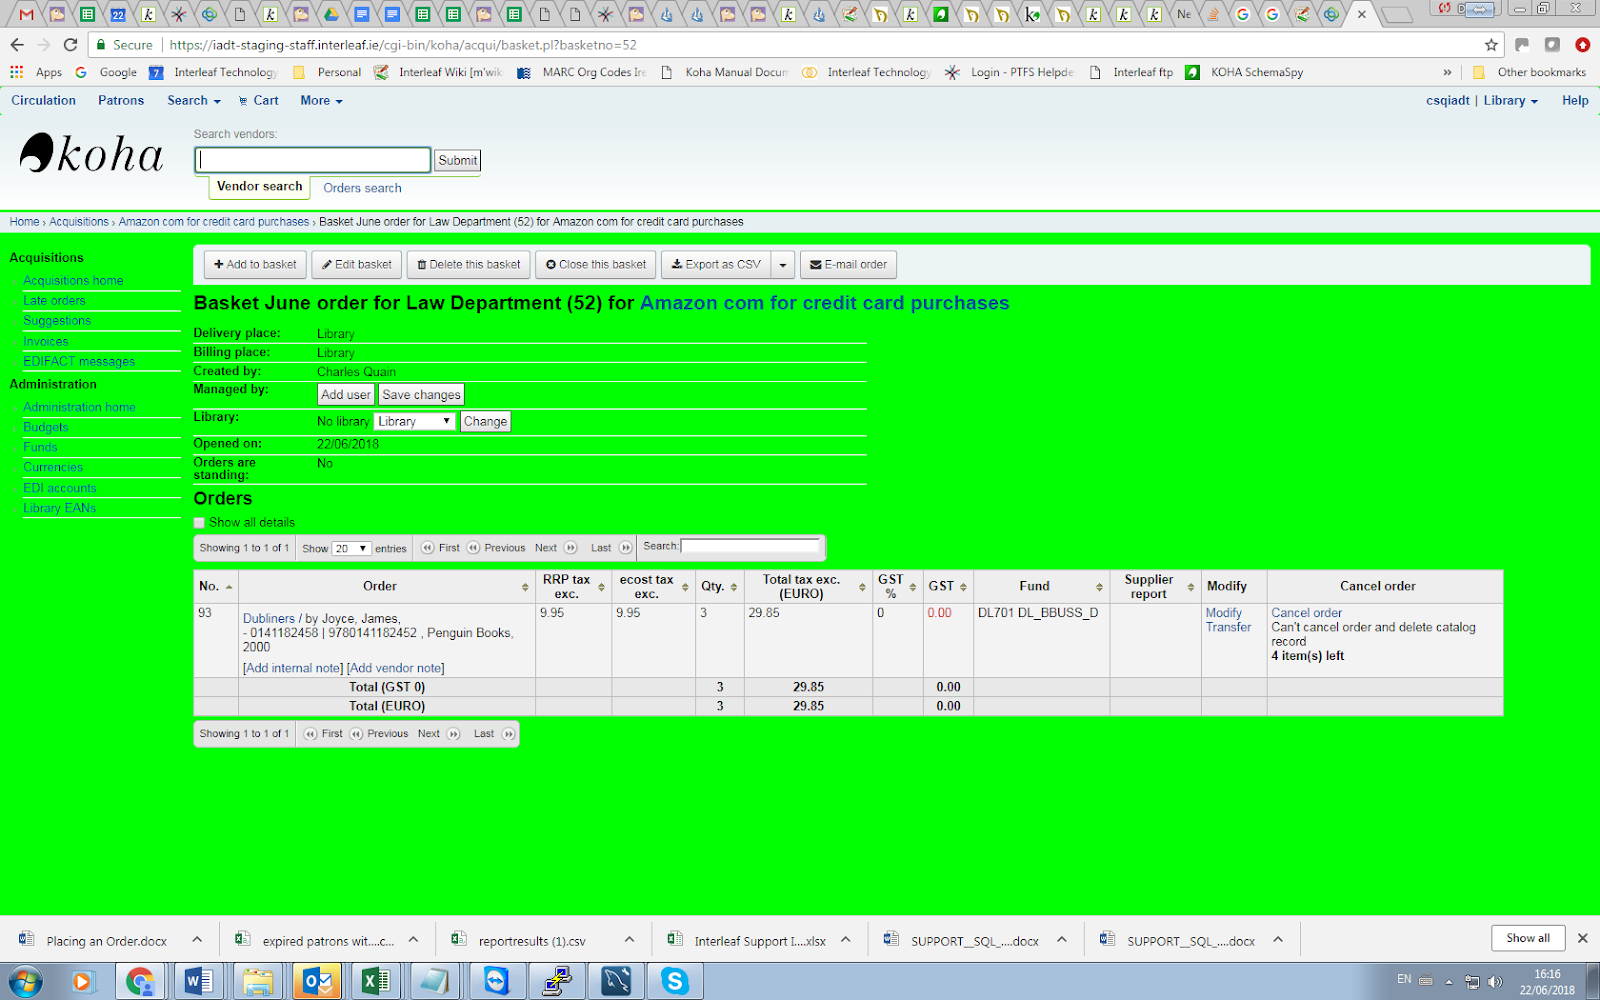
If you would like to see more details you can check the 'Show all details' checkbox
From here, you can add more items to the basket or edit or remove the items that you have added.
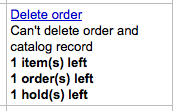
Choosing to 'Cancel order' will delete the order line but leave the record in the catalog.
Choosing to 'Cancel order and catalog record' removes both the order line and the record in the catalog.
The catalog record cannot always be deleted. You might see notes explaining why.
Choosing to ‘Transfer' will move the order line to another vendor.
On the summary page, you also have the option to edit the information that you entered about the basket by clicking the 'Edit basket header information' button, to delete the basket altogether by clicking the 'Delete this basket' button, or to export your basket as a CSV file by clicking the 'Export this basket as CSV' button.
If you're using EDI for your order you can click the 'Create EDIFACT order' button when you're done to send the file to the vendor and close the basket.
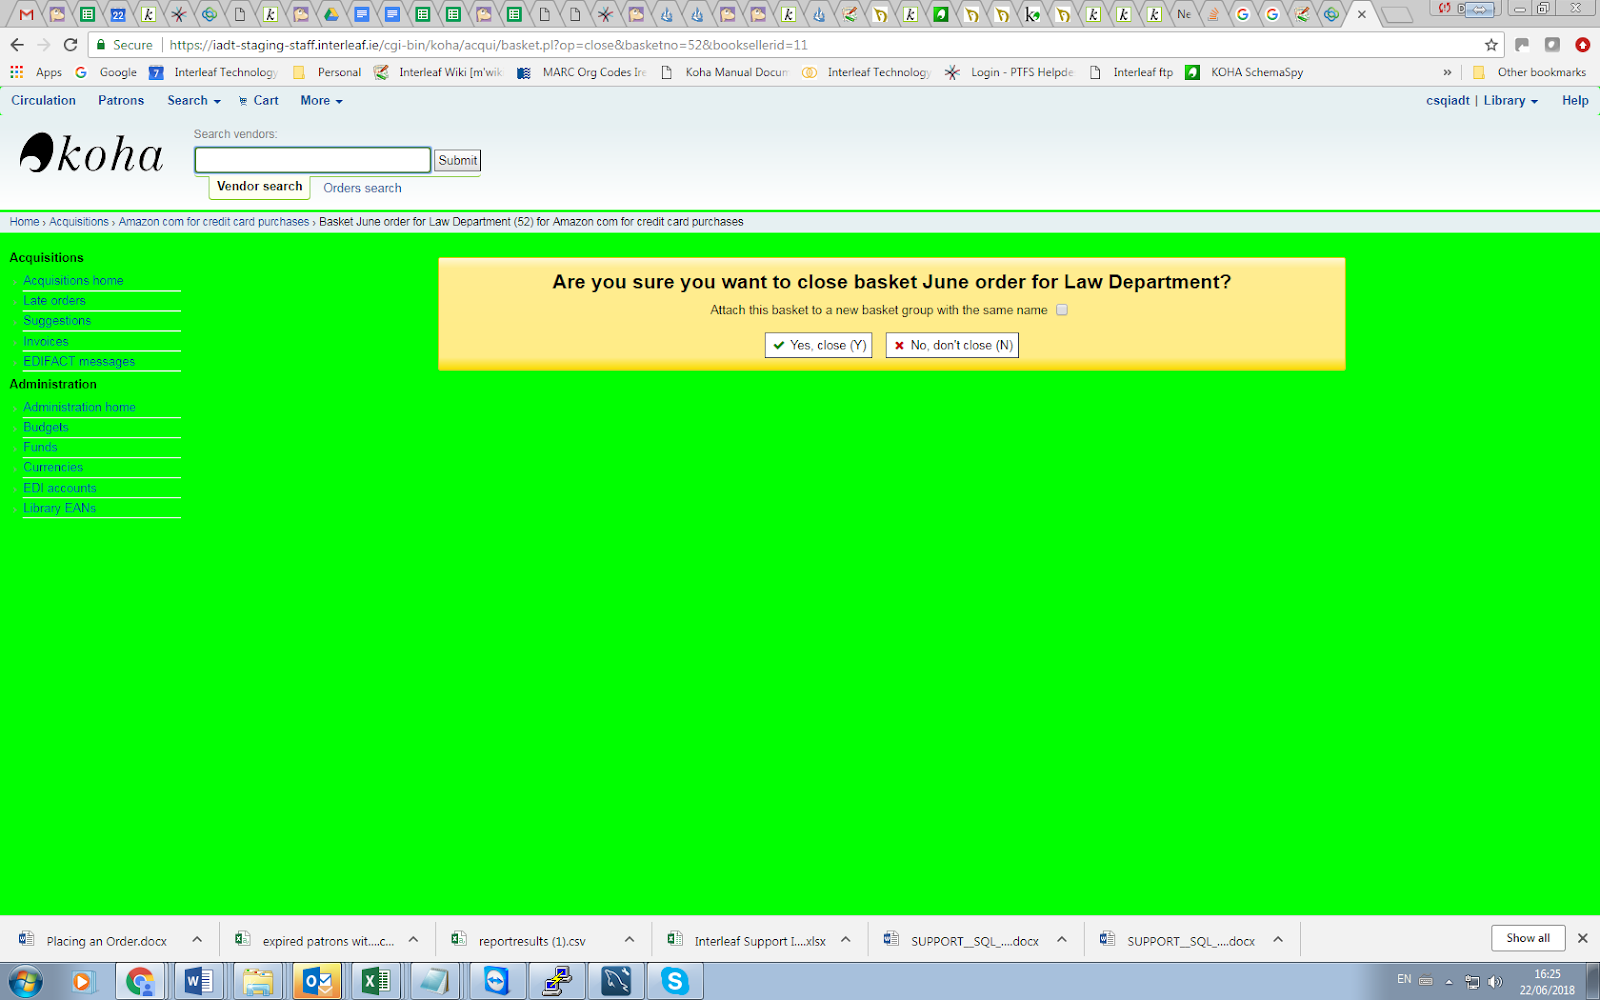
Once you're sure your basket is complete, you can click 'Close this basket' button to indicate that this basket is complete and has been sent to the vendor.
Important
You must close the basket to be able to receive items when they arrive. Only items in closed baskets will show as ready to receive.
If you have your ‘BasketConfirmations’ preference set to show a confirmation, you will be asked if you are sure about closing the basket.
Related Articles
When to create item records for titles brought in through the Acquisitions module
This document will outline the options for setting a default functionality for creating item records for copies of titles added through the Acquisitions module. While it is possible to set up default behaviour for creating item records for titles ...Receiving an Order for a newer Edition
How to Receive an Order for a newer Edition This document explains how to receive an order when the vendor supplies a newer edition of the book. The original order was placed for the 2nd Edition of Gray’s Anatomy for Students. The supplier ...How to re-arrange the order of subfields
This document will outline how to move the order of subfield codes in a framework. By default, these subfields appear in ascending numeric and alphabetic order but can be manually rearranged to appear in a particular pattern. If you require more ...Setting up Budgets for the new financial year
End of Year - Setting up Budgets for the new financial year In this example we are taking the 2014 budget and creating the 2015 budget. Go to Administration > Budgets Beside your 2014 Budget, click on the dropdown beside Action and select Duplicate. ...Barcode, RFID and Tandem Tags Order Form
How to place an order for numerical barcodes, RFID tags or tandem tags Order Form To place an order please fill out the details on the form in the link below. The form will then be submitted to our sales team for processing and you will be updated ...